Saturday, August 27, 2016

Totally Techniques - Thoughtful Branches


Welcome back to another Totally Techniques blog hop - this month we are a little light on numbers as people are busy with other commitments. . . so we have chosen something a little different, rather than showcase a particular technique we are highlighting a promotional bundle - Thoughtful Branches!

Wasn't Shelagh's project awesome?
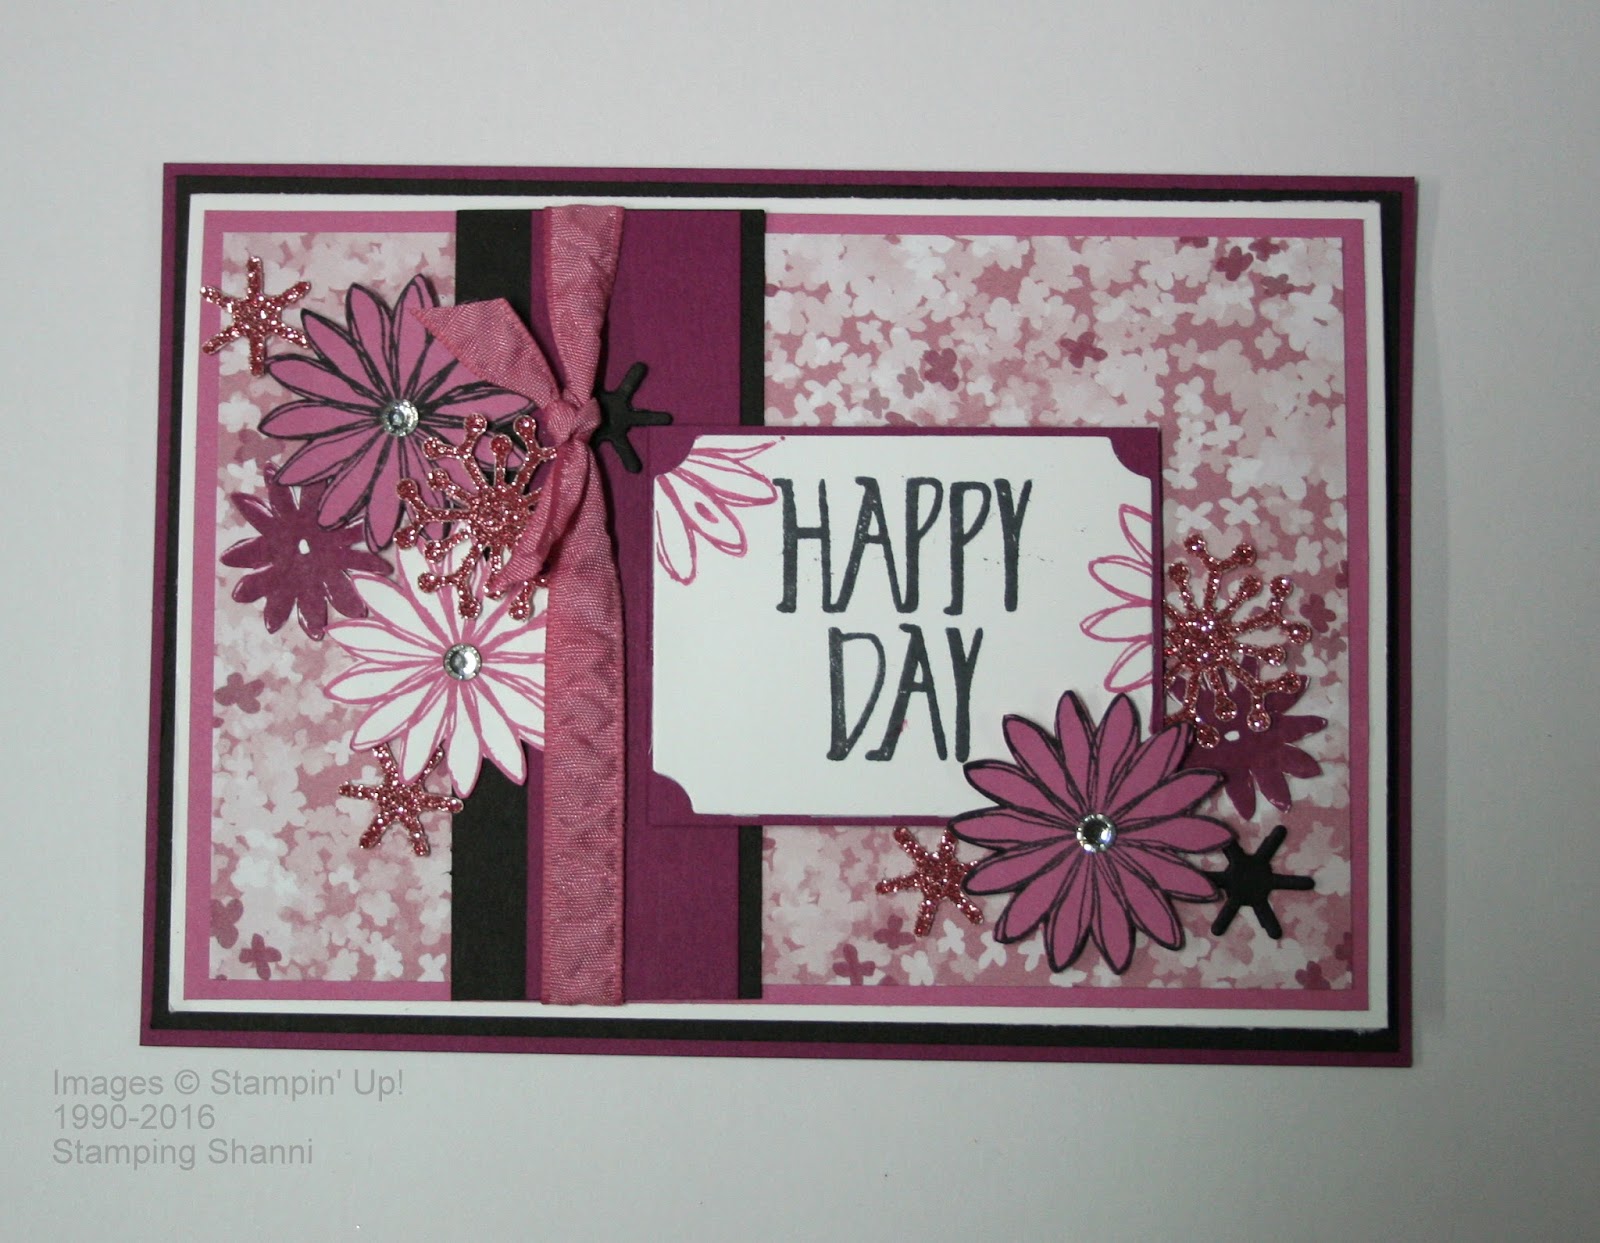
Here's mine:
 I wanted to do something a little different as all the cards online seem to feature the tree and leaves framelits and the tree leaves stamp set and birds. . .

This is a square 6" card or 14.8cm for the metric markets. The base card is Whisper White and it is mounted with a square of Soft Suede cardstock. I then mounted that a square of Whisper White with a layer of Vellum cardstock over the top which I first embossed with Woodland TIEF.
Texture is something that I cannot live without. I layered onto the Vellum a strip of Gold Glimmer Paper, next a layer of Gold Foil Cardstock, then the 5/8" Burlap Ribbon stuck as a strip. finally I added a piece of the 5/8" Mini Striped Ribbon in Delightful Dijon but it looks like its gold in real life. I threaded a string of gold sequins through the granny knot for added interest.
I stamped the leaves from the Thoughtful Branches stamp set in a rock 'n roll technique in Crumb Cake and Soft Suede and Pumpkin Pie and Soft Suede. I fussy cut them to remove the white edge after I had cut the shapes out with the matching framelit from the Beautiful Branches set. To tie in the colour I then edged the leaves using the Gold Wink of Stella pen. I distressed the leaves a little bit with my bone folder and stuck them down with glue dots.

The tree leaves from the Thoughtful Branches set was heat embossed with Gold Stampin' Emboss Powder. I cut them out with the matching framelit from the Beautiful Branches set and then cut the piece up even further and framed the sentiment which is stamped in Memento Tuxedo Black Ink on Whisper White cardstock - the words are both from the stamp set. I then cut the sentiment out with an Oval framelit. I mounted the oval with dimensionals.   
I hope you have taken some inspiration from our hop today and that you stop by again soon.

Patrice was the first of our bloggers today but you may not have seen her blog if you came by another link so check it out now!

Cheers
Shanni xx  

Order of Blog Hop

Shannean Moncrieff (that's me)

Saturday, August 13, 2016

Fancy Folds - Peek-a-Boo Cards

Can you believe that it's been a month since I last crafted with thee galz?! Welcome back!

This month we are featuring Peek-a-Boo Hidden Message Cards ~ thanks for stopping by. The chances are that you were just visiting with the incredible Martha Inchley. . . wasn't her project beautiful?

This is mine:
We have followed the great instructions by the amazingly talented Dawn Griffiths (I love this woman who has a massive personality and even bigger heart).

My base card is Whisper White mounted on a rectangle of of Basic Black and another of Rich Razzleberry to frame up the card which looked a little bland to my eye.  The card is landscape as I think the peek-a-boo feature works best this way.
You know me, I like weight in my cards and the more layers the better so that's what I have done with this card. On the front I have mounted a piece of Blooms & Bliss Designer Series Paper on a rectangle of Rich Razzleberry.  About one third across the DSP I adhered a piece of Basic Black cardstock mounted with a contrasting piece of Rich Razzleberry. I added a piece of the new Sweet Sugarplum Ruched Ribbon with a simple granny knot for texture. This DSP is pretty but a little bland without popping the colour with a variety of combinations.
I stamped the large flower from Perfectly Wrapped in Memento Tuxedo Black Ink and Sweet Sugarplum on Sweet Sugarplum and Whisper White cardstock respectively. I also stamped the smaller flower in Rich Razzleberry on Whisper White card. I fussy cut the flowers and arranged them around the ribbon and sentiment.

Using the Tags & Labels Framelits I cut a piece of Whisper White cardstock to an appropriate size for the sentiment from the Perfectly Wrapped set (this set is so versatile). The sentiment is stamped in Tuxedo Black ink. Around the edges I again used the large flower from the Perfectly Wrapped stamp set to stamp the edges in Sweet Sugarplum. I mounted the sentiment punch out on a piece of Rich Razzleberry cardstock and trimmed it to size - the sentiment on plain white was a little lost on the busy background. The sentiment is mounted using dimensionals.
I needed some colour and texture contrasts for the flowers so added a few cut outs from the Botanical Builder Framelits set using both Basic Black cardstock and Blushing Bride Shimmer Paper (I adore this shimmer paper and incorporate it on so many projects).  The flowers are adhered with glue dots and of course I couldn't resist the bling of a few Rhinestone Basic Jewels.
Inside the card I mounted a piece of Sweet Sugarplum cardstock on a rectangle of Rich Razzleberry and cut out the void using the Tags & Labels Framelits that fit the "hooray" sentiment perfectly. I added another fussy cut flower because it seemed a bit naked and of course needed a rhinestone in the centre.  Because the inside of the card is not completely stuck down as we are used to I think that I am going to use this card for a gift card in due course.

This is not a fold that I would have attempted but for this months design team choice but I can highly recommend it and it is so easy.


Please take the time to pop by our next DT member, Anne Granger who has a beautiful card to share.
Until next time I hope your fingers are sticky and your life full of glitter!
Shanni

Blog Hop Order
Shannean Moncrieff (that's me)